
Kitchen & Bathroom Renovation in Marchmont, Edinburgh
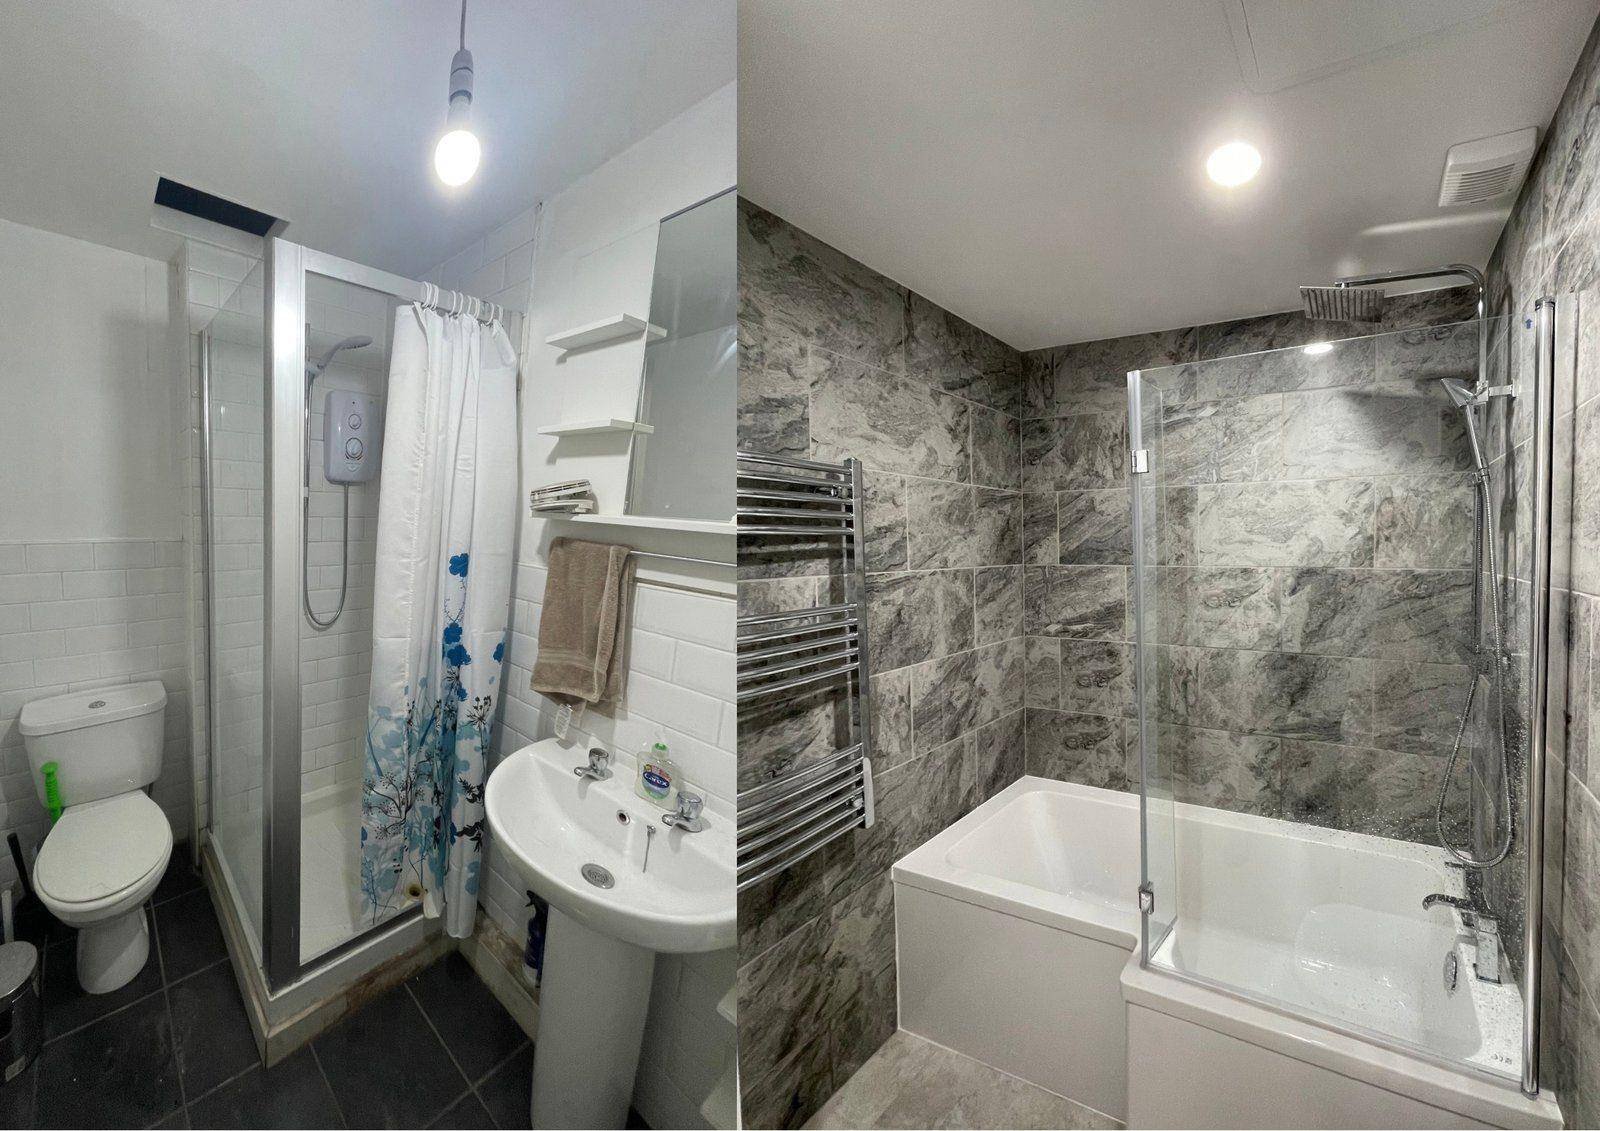
Overview: Bily Renovation completed a major refurbishment of a period flat on Marchmont Crescent, Edinburgh in 35 days. We enlarged a cramped bathroom from about 2 m² to 5 m², completely renovated the kitchen, rebuilt a damaged kitchen ceiling, upgraded plumbing and kitchen electrics, installed acoustic plasterboard to a bedroom wall, and repaired and decorated the flat throughout. Project labour: £45,000. Materials, bought separately by the client, cost around £23,800 (about £68,800 in total).
Project at a Glance
- Location: Marchmont Crescent, Marchmont, Edinburgh
- Completed: 27 July 2025
- Client: Alyson
- Property: Period flat
- Project: Multi-room refurbishment
- Duration: 35 days
- Labour: £45,000
- Materials: Bought separately by the client, around £23,800 in total
- Bathroom: Enlarged from about 2 m² to 5 m² and completely rebuilt
- Layout: Non-loadbearing internal wall removed; bathroom doorway repositioned
- Kitchen: Complete renovation
- Electrical: Kitchen rewiring carried out by a certified electrician
- Plumbing: New kitchen and bathroom plumbing
- Kitchen ceiling: New timber frame and plasterboard ceiling
- Flooring: LVT flooring fitted in the kitchen (about 23 m²)
- Bedroom: Acoustic plasterboard installed to help reduce neighbour noise
- Decoration: Woodchip stripped; walls repaired; walls, ceilings and cornices painted
- Management: Bily Renovation coordinated the project from strip-out to final decoration, led by Ruslan Bily
Note: All prices in this case study are labour only. Kitchen units, worktops, appliances, sanitaryware, tiles, flooring and other materials were bought separately by the client and are not included.
The Brief: One Contractor for the Whole Refurbishment
Alyson’s flat needed far more than a new kitchen and bathroom. The bathroom was only about 2 m², too small for the layout she wanted. The kitchen needed a full renovation. The other rooms needed repairs and decorating. One bedroom also picked up noise from the neighbouring flat.
Instead of hiring separate trades for each job, she had Bily Renovation manage everything as one coordinated project.
Bathroom: From 2 m² to 5 m²
Can you make a small bathroom bigger in an Edinburgh flat? Sometimes, and this project is a good example.
Next to the 2 m² bathroom was a cupboard with space nobody was using. We confirmed the wall between them was non-loadbearing and removed it. That took the bathroom to about 5 m², roughly two and a half times the original floor area.
The old doorway no longer suited the new layout, so we closed it and formed a new one in a different position. The enlarged room then had space for a bath and a properly planned layout.
The bathroom was fully rebuilt: new plumbing, electrical alterations, plastering, plasterboard where needed, wall tiling, bath and sanitaryware, and decoration.
The key decision came before any tile was laid. We changed the space itself, instead of squeezing smaller fittings into a room that was too small.
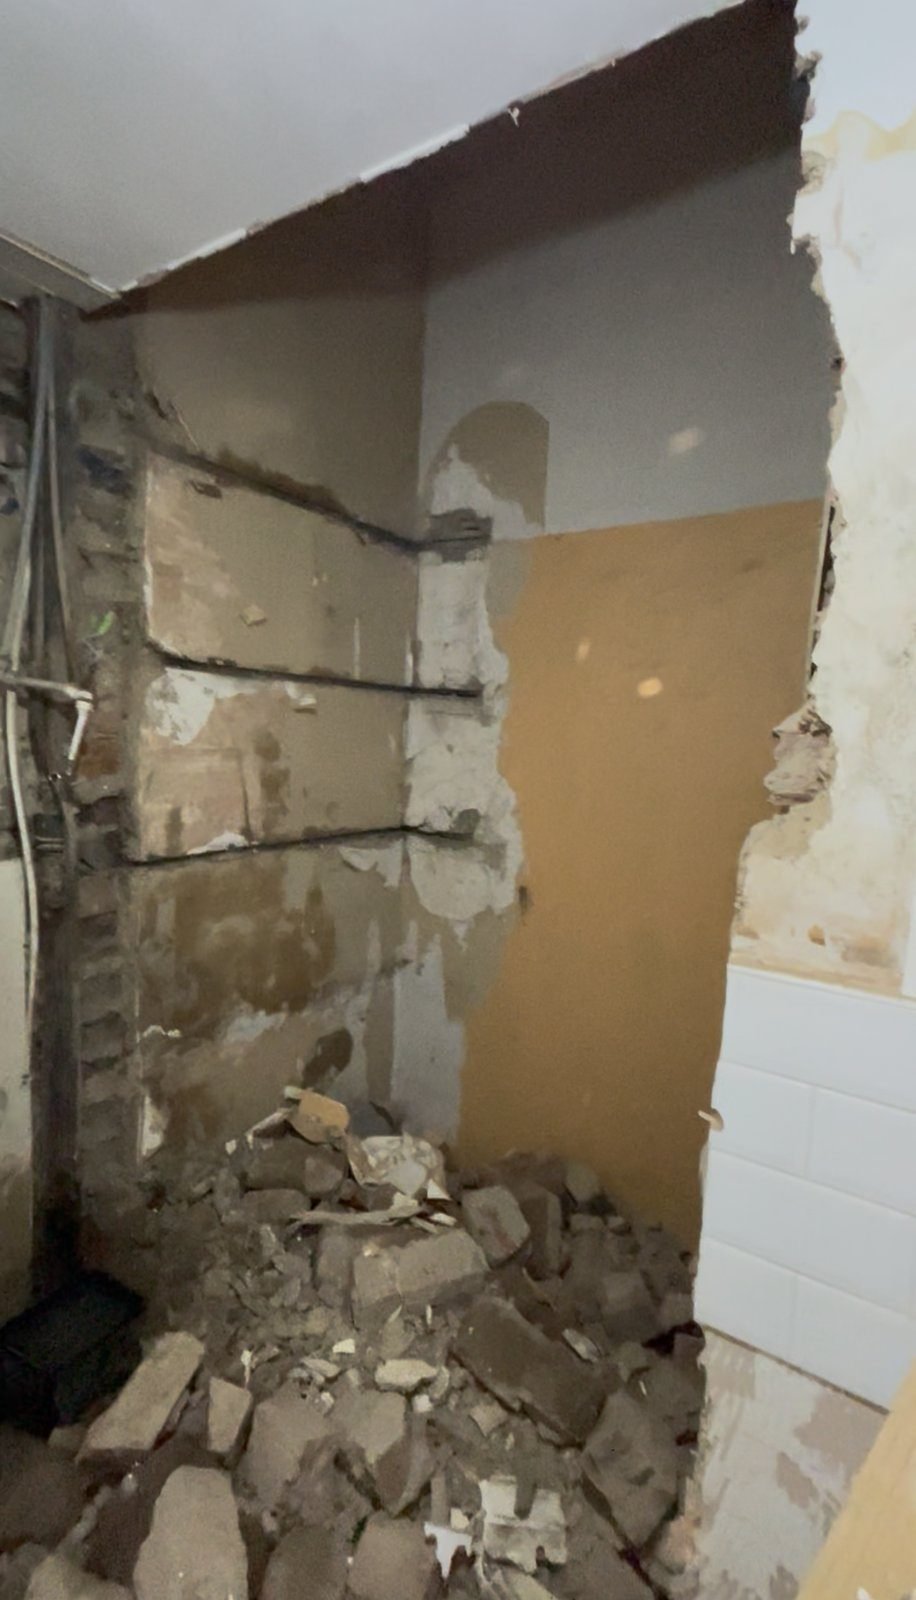
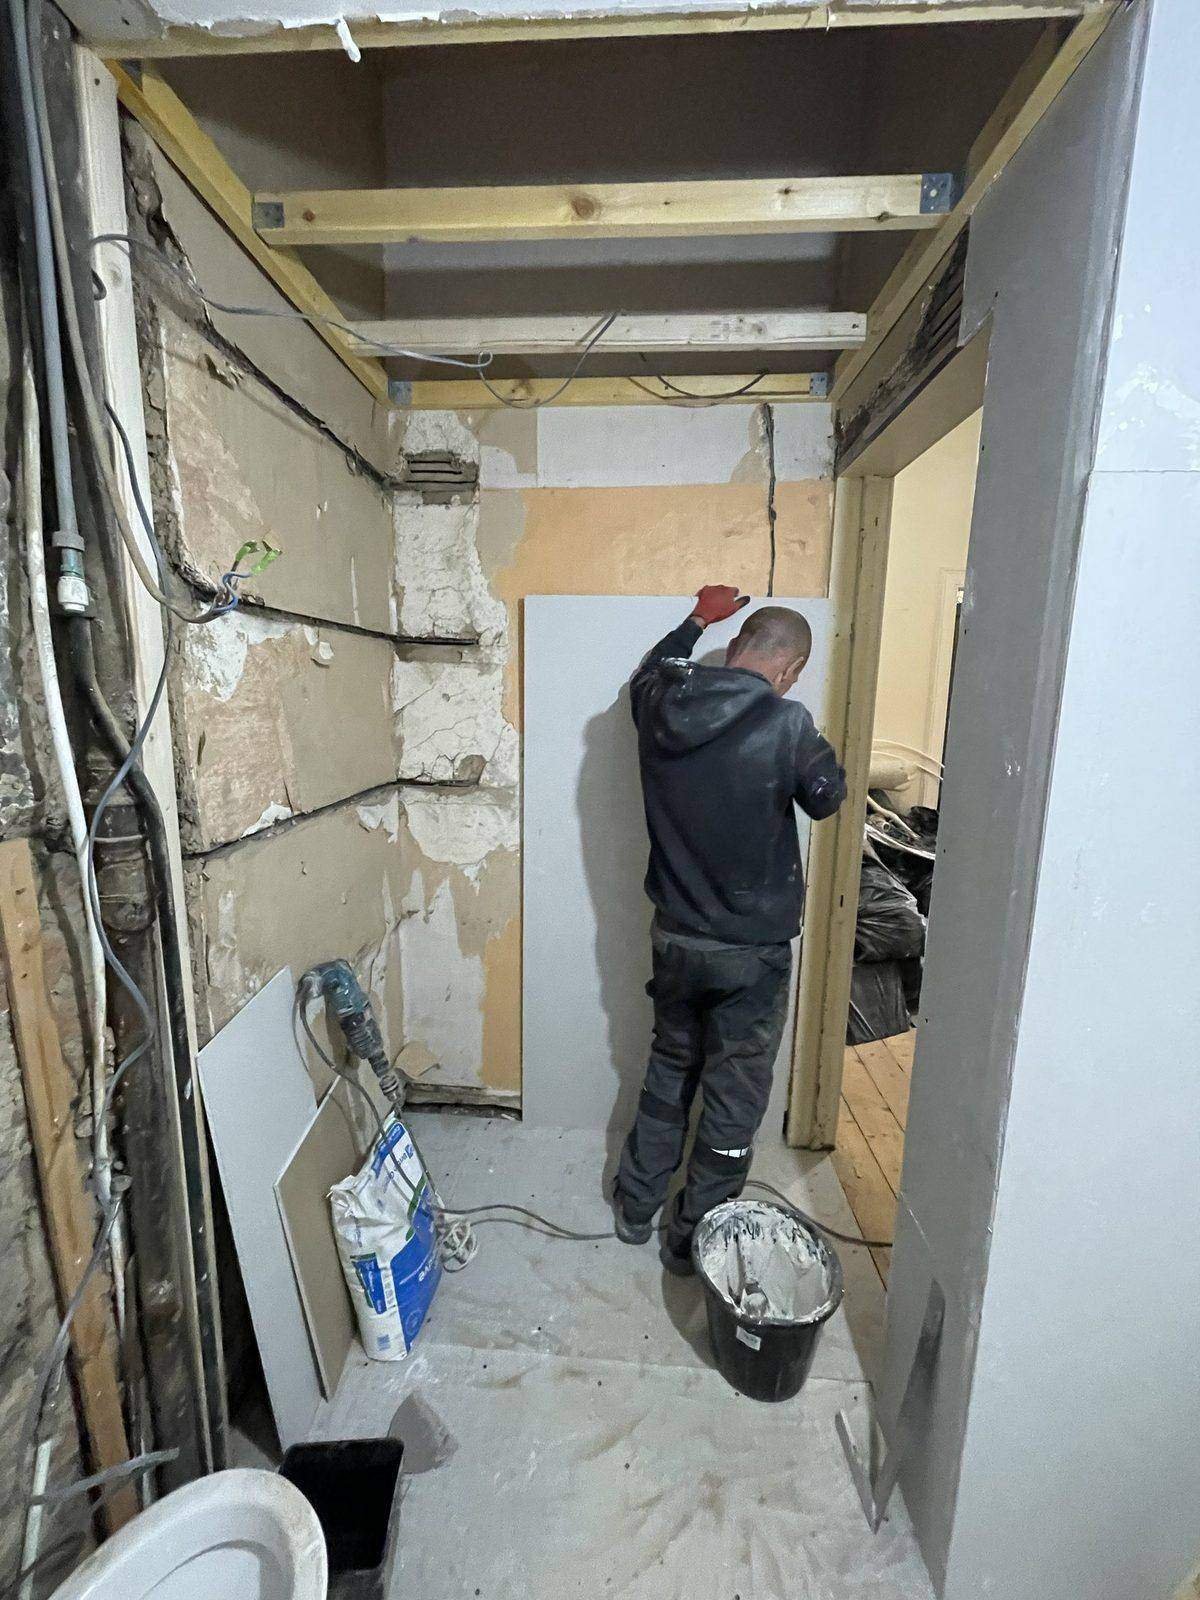
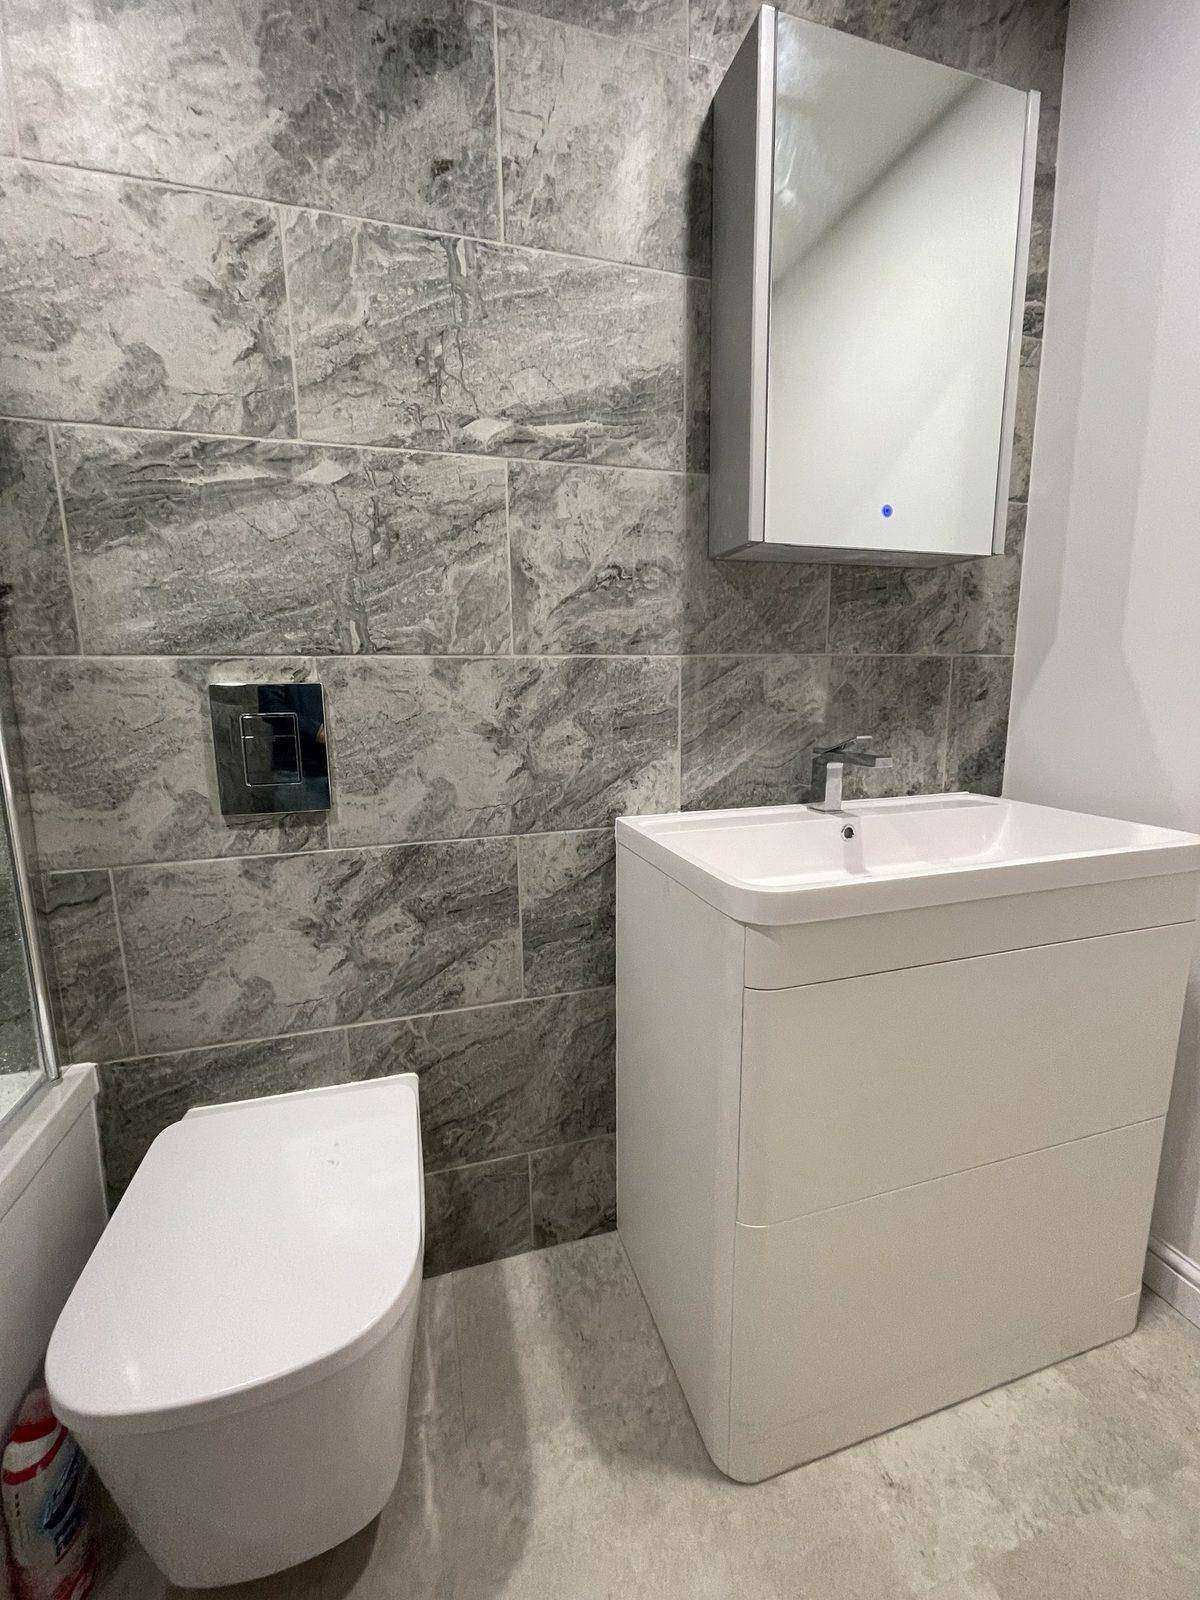
Tip for Edinburgh homeowners: If your bathroom is tiny, look at what sits beside it. An adjacent cupboard or spare internal space can solve the problem better than compact sanitaryware.
Kitchen: What We Found at Strip-Out
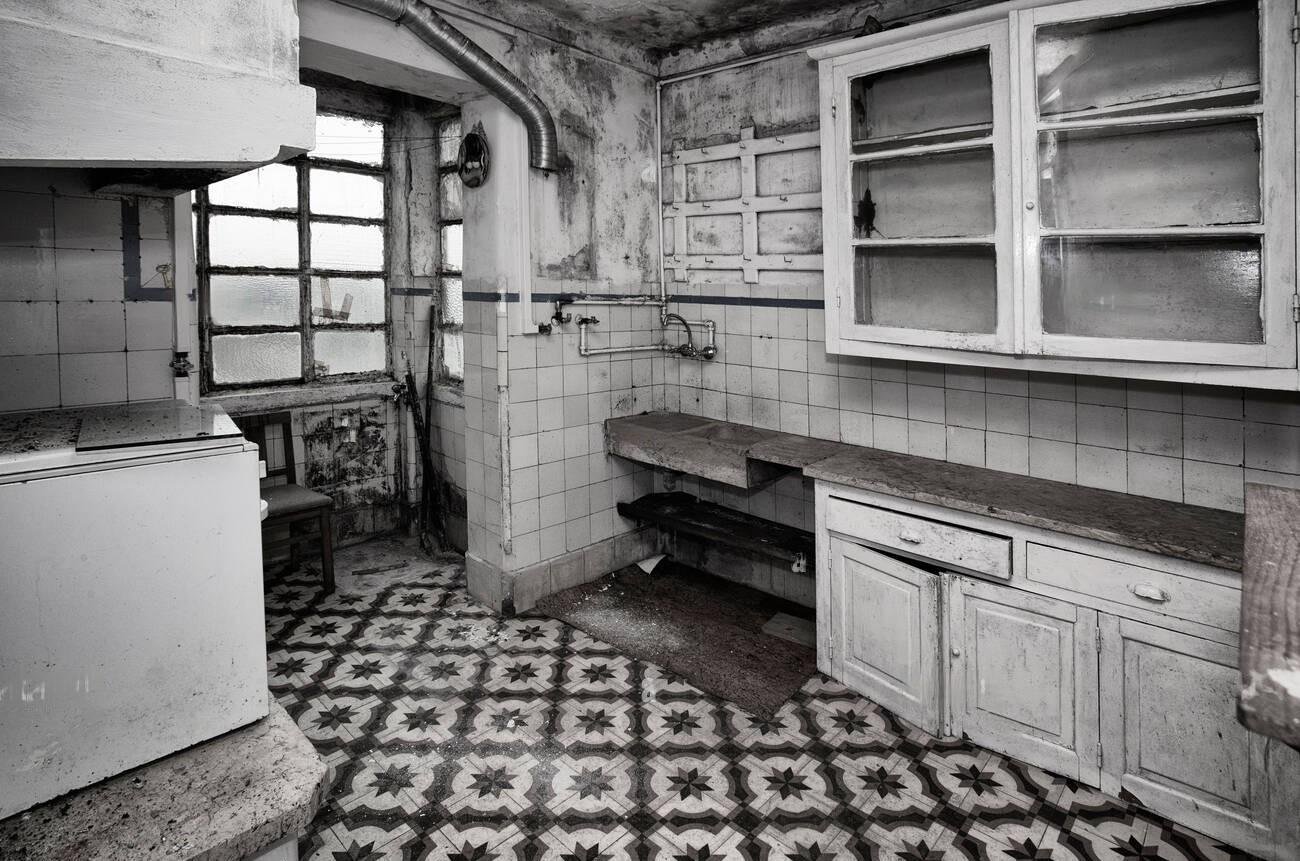
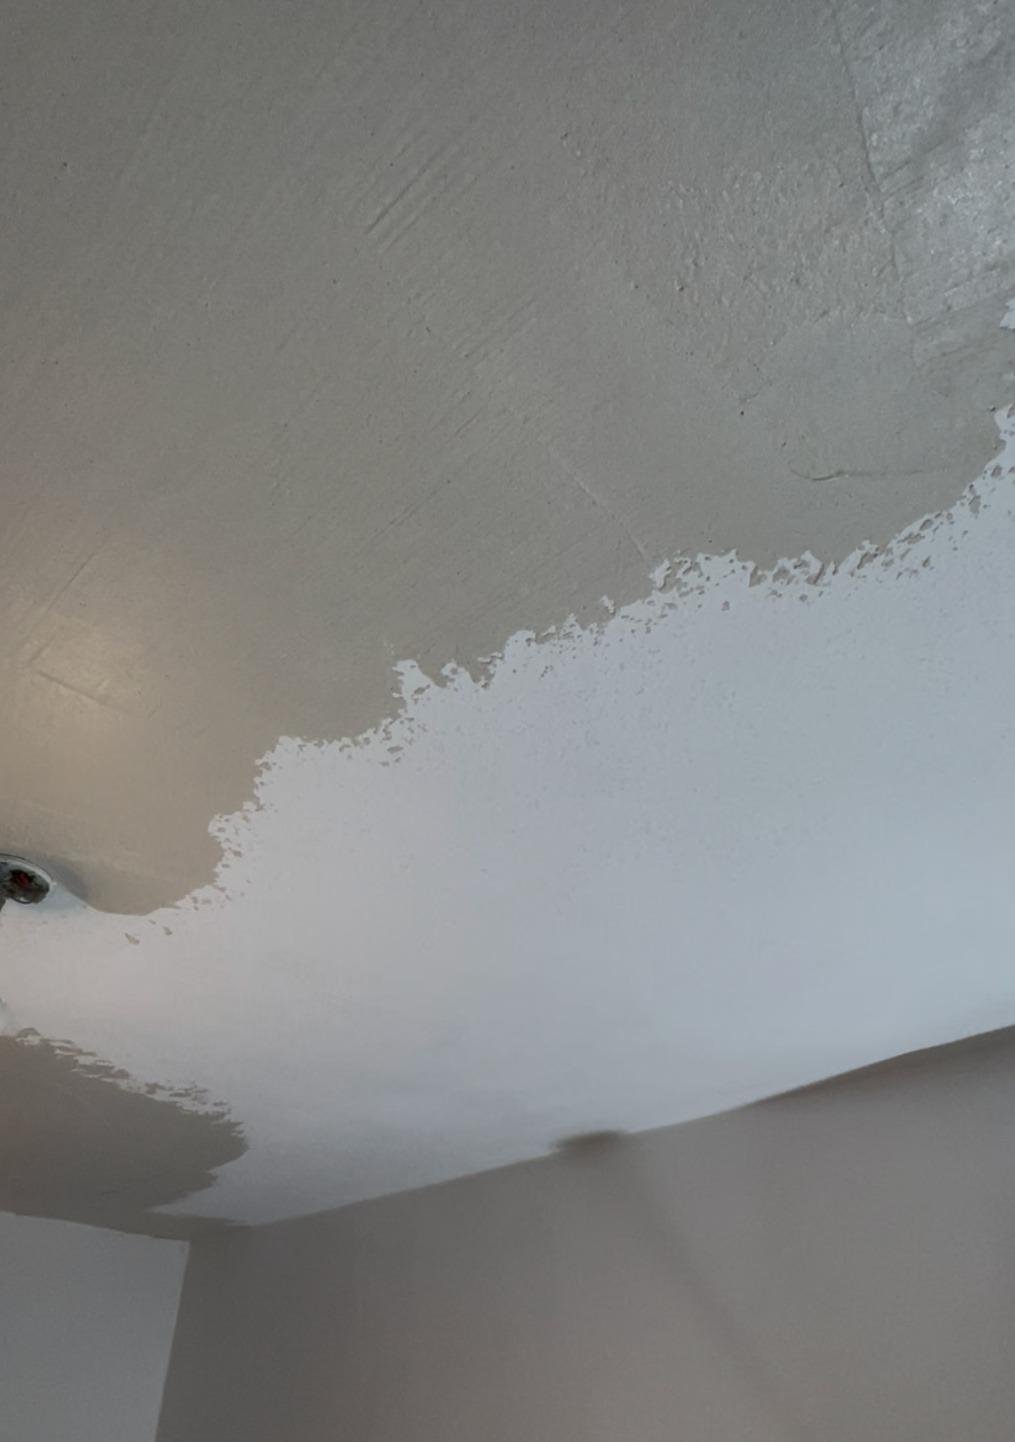
We removed the old kitchen and started stripping the wall coverings. A large section of plaster came away, and holes and weak areas appeared in the ceiling above.
Filling and painting over that would have hidden the problem, not fixed it. So we built a new timber frame, fixed new plasterboard to it, and finished it smooth for the new kitchen.
Older Edinburgh flats often hide their real condition behind old wallpaper, paint and kitchens. Strip-out is when you find out what you are really dealing with. A good contractor tells you what they find and explains the options.
The Order We Worked In
The sequence matters as much as the work itself:
-
1Old kitchen removed: Careful strip-out down to the bare walls and joists.
-
2Old wall coverings stripped: Removal of aged linings and multi-layered wallpaper.
-
3Ceiling damage exposed and assessed: Thorough inspection of structural stability and substrates.
-
4New timber ceiling frame built: Levelled, rigid timber framing installed across the room.
-
5New plasterboard ceiling installed: Boarding fixed securely to create a flat, true ceiling plane.
-
6Kitchen rewired: Complete rewiring carried out by a certified electrician with new cables inside the walls.
-
7New plumbing installed: Precision pipework, waste runs, and isolation points configured.
-
8Walls repaired and plastered: Skim plastering applied for a completely flat, mirror-smooth base.
-
9New flooring fitted: Premium LVT flooring fitted across approximately 23 m² of kitchen space.
-
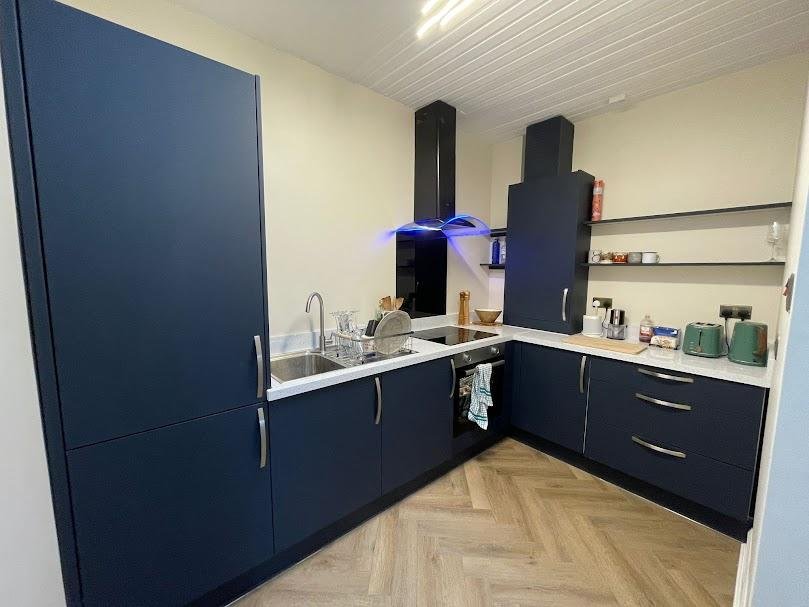
10New kitchen installed: Fitting units, worktops, splashbacks, and integrated appliances.
-
11Final painting and finishing: Multi-coat durable painting, cornice detailing, and handover snagging.
Every step before the kitchen went in was there so that finished surfaces never had to be reopened.
Bedroom: Reducing Neighbour Noise
Does acoustic plasterboard stop neighbour noise? It can help, but it is not a full soundproofing system.
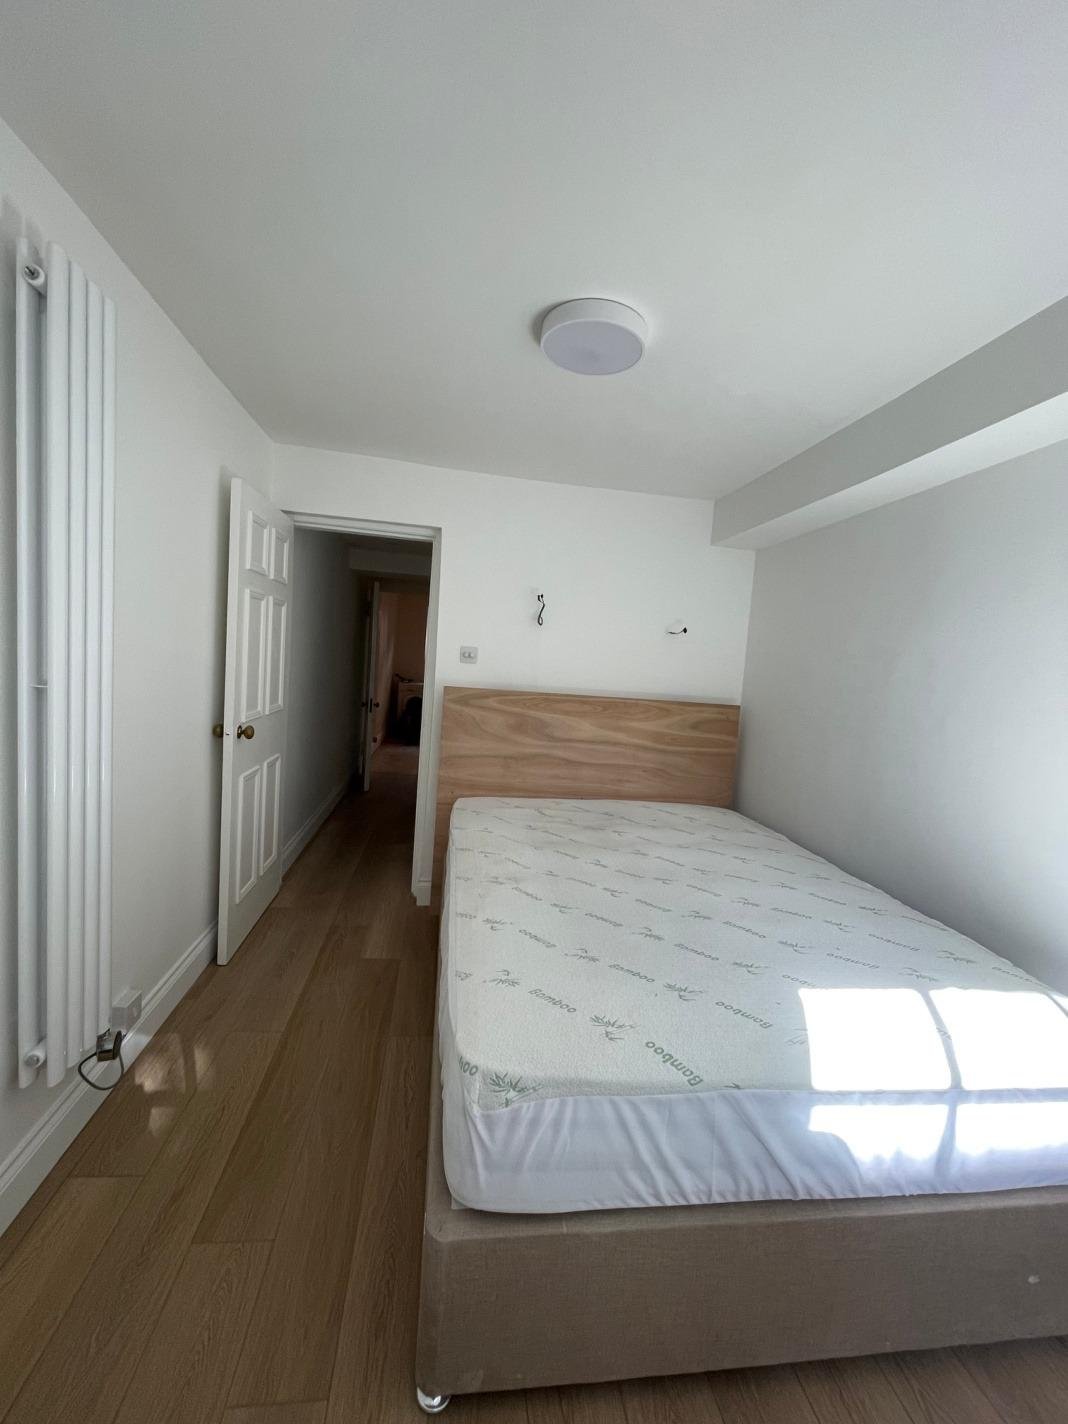
Alyson’s bedroom was picking up noise from next door. We fitted acoustic plasterboard to the affected wall, then plastered and painted it so it looks like any other wall.
How well it works depends on the existing wall and the route the sound takes. We haven’t measured the reduction and we don’t promise a figure. For serious noise problems, the wall and surrounding structure should be assessed first to decide on the right build-up.
Walls, Woodchip and Decorating
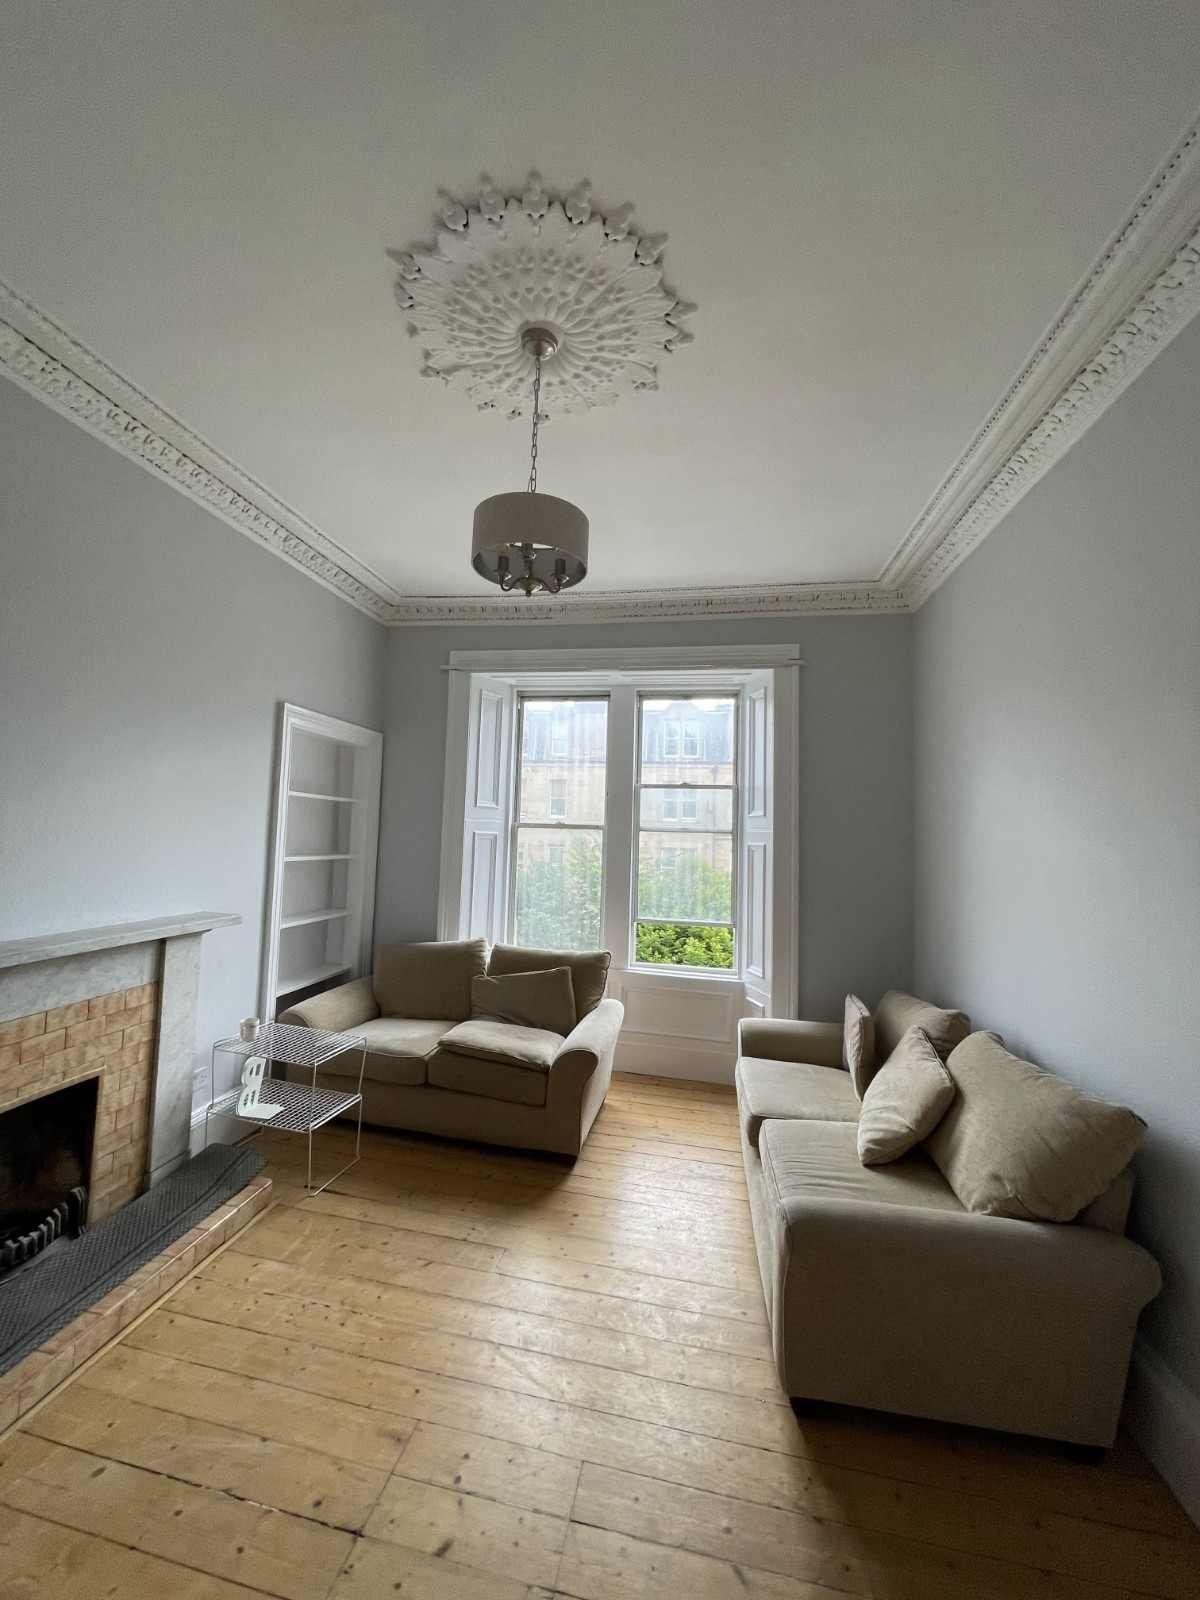
We stripped the old woodchip, repaired the walls and prepared them properly before painting. We also painted the ceilings and the existing cornices, which keeps the period character of the flat while giving every room a clean finish.
Decorating came last, after the construction, plumbing, electrical, plastering and flooring work, so the new paintwork was never damaged by other trades.
Why One Team Managing Everything Mattered
When a renovation is split into unrelated jobs, things go wrong at the handovers. Here, the bathroom layout had to be settled before plumbing and tiling. The ceiling had to be rebuilt before the kitchen could be finished. Cables and pipes had to go in before walls and units. The acoustic board had to go up before the bedroom was plastered.
We managed all of it as one project, in the right order.
What Did This Marchmont Renovation Cost?
£45,000 for labour. The client bought the materials separately, so they are not in this figure. Alyson spent around £23,800 on materials across the whole project, so the total project cost was roughly £68,800.
That covered enlarging and rebuilding the bathroom, internal layout changes, plumbing, kitchen electrics, a full kitchen renovation, the new kitchen ceiling, flooring, acoustic plasterboard, plaster repairs, woodchip removal, and painting of walls, ceilings and cornices.
This is a real project figure, not a standard price for every Marchmont flat. We haven’t split it room by room because we don’t have a verified breakdown, and we would rather publish one true number than several estimates.
| Cost Element | Amount | Scope Covered |
|---|---|---|
| Turnkey Trade Labour | £45,000 | Bathroom enlargement, wall removal, doorway relocation, plumbing, certified electrics, ceiling rebuild, plastering, LVT fitting, acoustic boarding, woodchip strip & full decoration |
| Client-Purchased Materials | ~£23,800 | Kitchen cabinetry, worktops, appliances, sanitaryware, full bath suite, tiles, luxury vinyl flooring, acoustic boards & paint |
| Total Project Investment | ~£68,800 | Comprehensive multi-room period flat transformation in 35 days |
What Moves the Cost of a Project Like This
- Layout alterations: Whether walls are removed and doorways relocated to gain usable space.
- Substrate condition: The real condition of stone walls, timber laths, and ceilings once old layers come off.
- Services upgrade: Extent of new plumbing routes and complete kitchen rewiring by certified electricians.
- Flooring & plastering scope: Preparation of subfloors and square meterage of plaster skimming and acoustic insulation.
- Unexpected strip-out findings: Addressing hidden structural or moisture defects revealed behind old fittings.
The Result
- A bathroom two and a half times bigger (from 2 m² to 5 m²), with room for a full bath
- A fully renovated kitchen with a sound, level new timber-framed ceiling
- A quieter bedroom upgraded with acoustic plasterboard
- Repaired, decorated rooms throughout preserving period cornicing
- All delivered seamlessly in 35 working days
“Bily Renovation took on an enormous project with full bathroom remodel including tiling, kitchen renovation, woodchip strip and full painting, including ceilings and cornices… Absolutely first class, great communication, advice… No hesitation in recommending.”
What We’d Tell Another Marchmont Homeowner
- Don’t assume a small bathroom has to stay small: Check the space around it first. An adjacent cupboard can often be incorporated safely.
- Expect surprises behind old finishes: The ceiling looked like a simple decorating job until strip-out revealed holes and deteriorated plaster.
- Do plumbing and electrics before finishing walls and units: It prevents reopening completed plasterwork and keeps installations clean.
- Be precise about soundproofing: Ask exactly what will be installed and understand realistic expectations for acoustic plasterboard.
Frequently Asked Questions
About Bily Renovation
Ruslan Bily, Founder and Director
Ruslan founded Bily Renovation in December 2022 and personally coordinates every project. Based in Edinburgh, the company delivers turnkey transformations across kitchens, bathrooms, flooring, plastering, and decorating throughout Edinburgh, the Lothians, and Glasgow.
Marchmont Flat Renovation Gallery